|
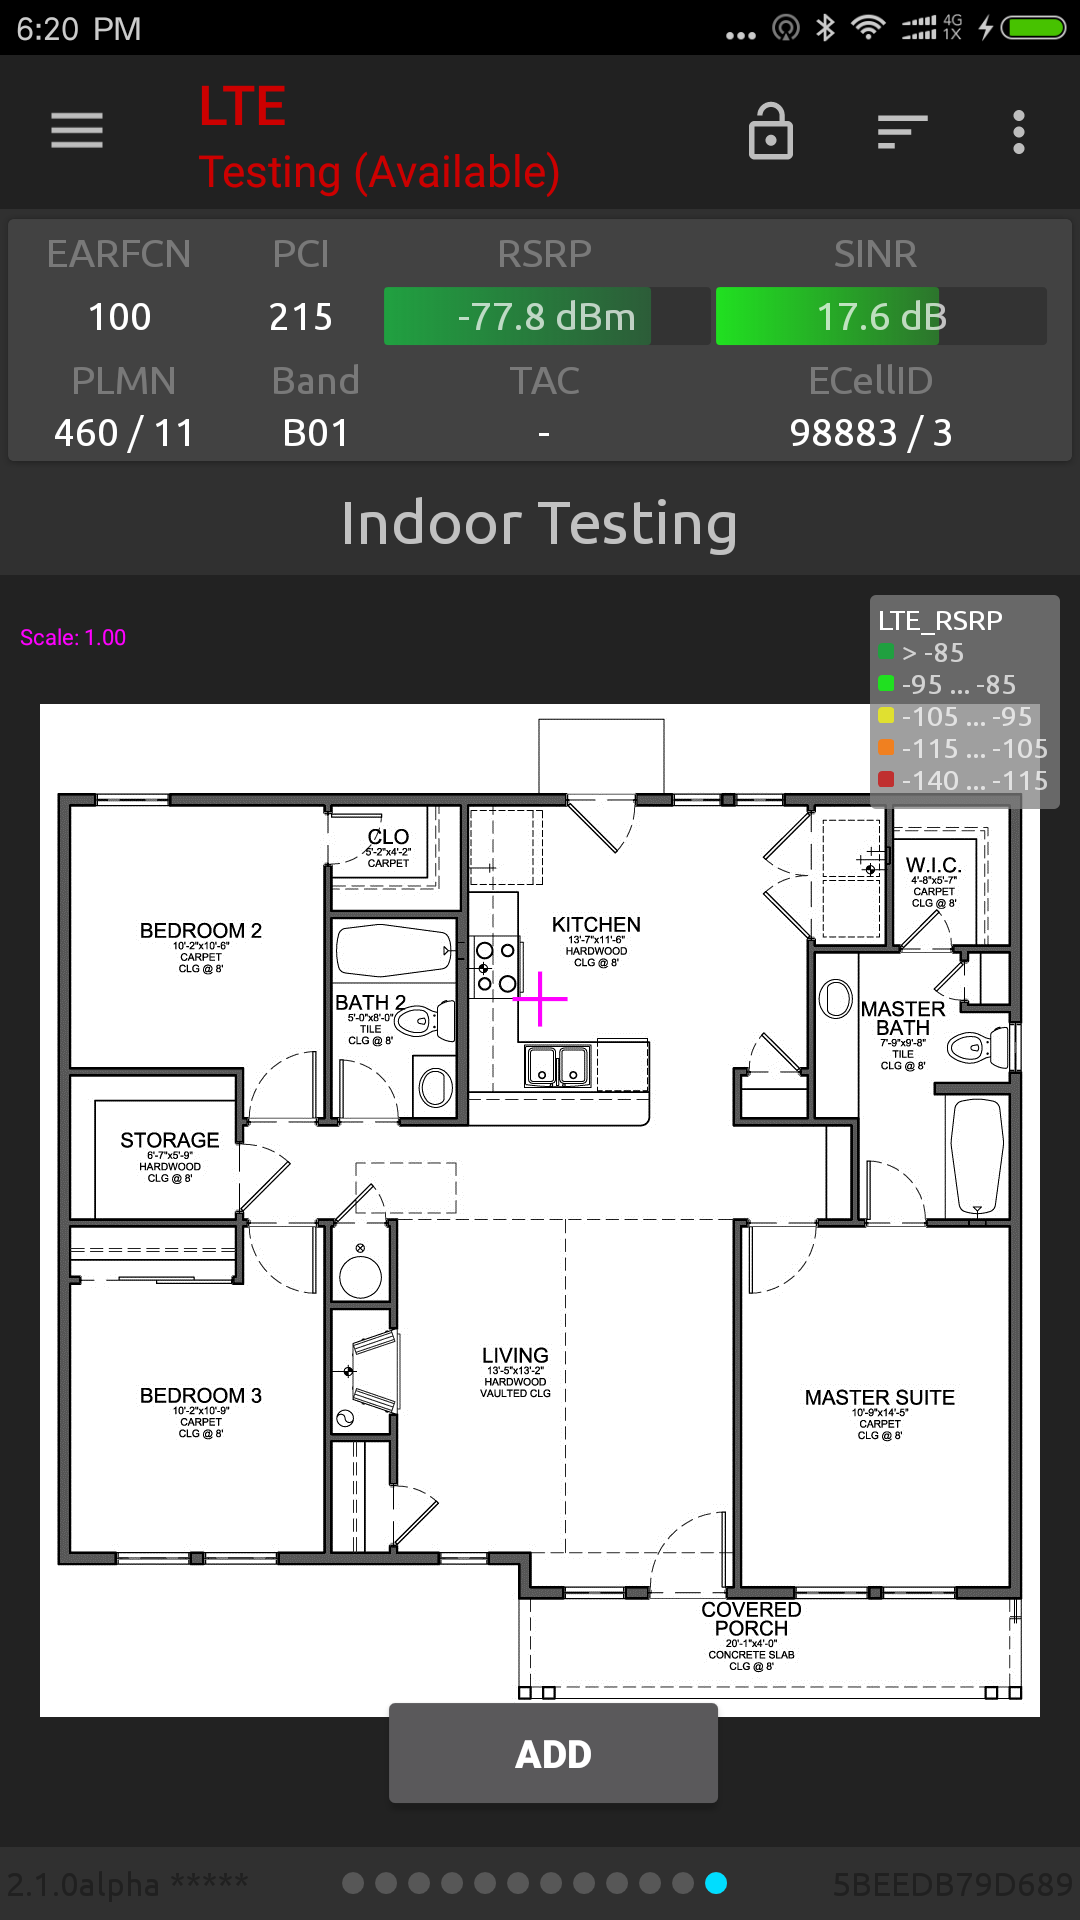
Tap the Menu button (in the right of Indoor testing View), and under Start select load Image and Pinpoint.
- After the image is loaded and the button “add” will be in the bottom of screen. You can add points with this interface.
- Pan the map to position the crosshairs correctly. It may also be helpful to use the zoom function; pinch and spread to zoom the map image in and out. Alternatively, you can double-tap to zoom out to normal. The current magnification is indicated numerically in the top left corner.
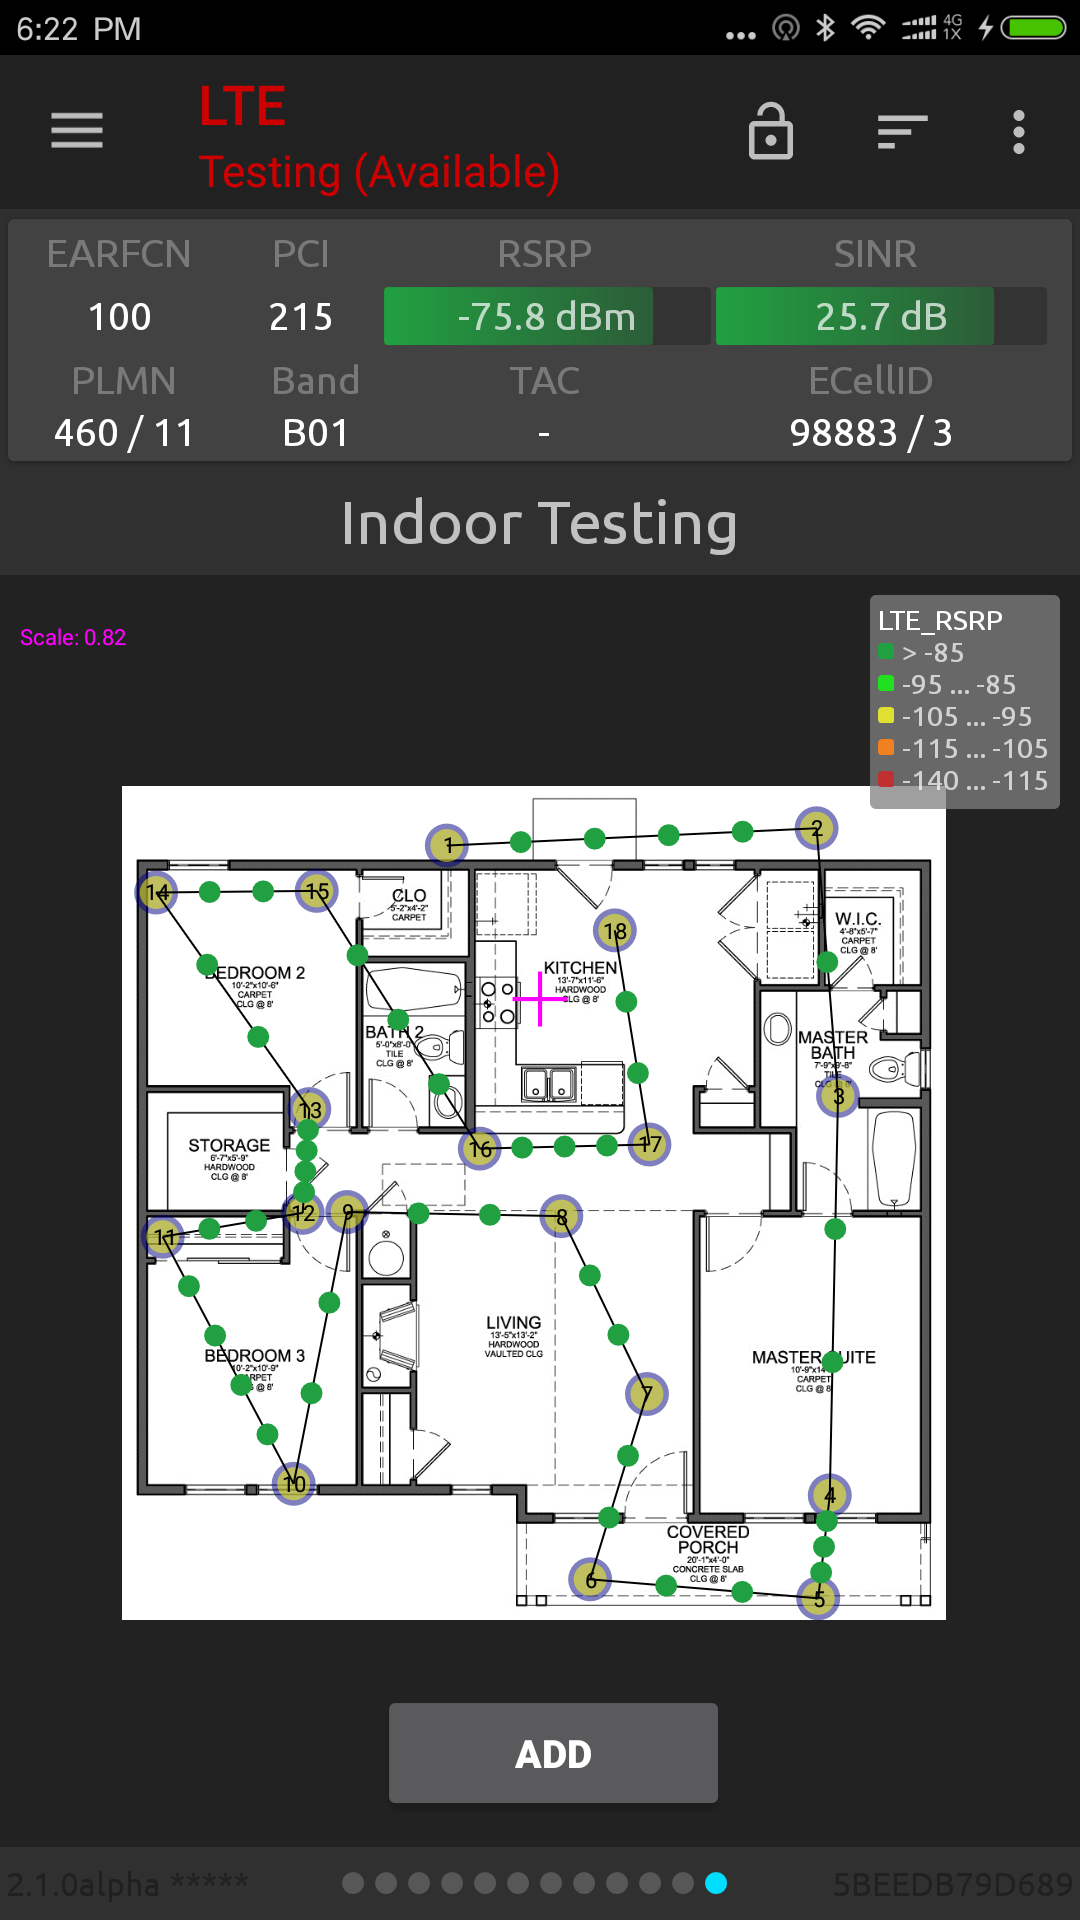
- Tap Add pinpoint to place a waypoint at the spot marked by the crosshairs. The waypoint is marked by a circle symbol and labeled with a sequence number.
- Pan the map to position it for the next waypoint, then tap Add pinpoint again. A new pin is drawn and joined to the previous one by a connecting line.
Route markers are drawn along each route segment as soon as it has been completed, that is, when you mark a new waypoint ending the segment. A maximum of 10 route markers are drawn between two waypoints.
- Continue pinpointing at regular intervals along the route, and whenever you change direction. If you stop along the way, pinpoint when you stop and again when you resume your walk.
- When you have completed your route, tap the Tap the Menu button, and select Stop Pinpoint.
|