Loading a Planned Route and Using It for Pinpointing
Load the map set containing the planning route.
Tap the Menu button, and under Actions select Load Route & Pinpoint.
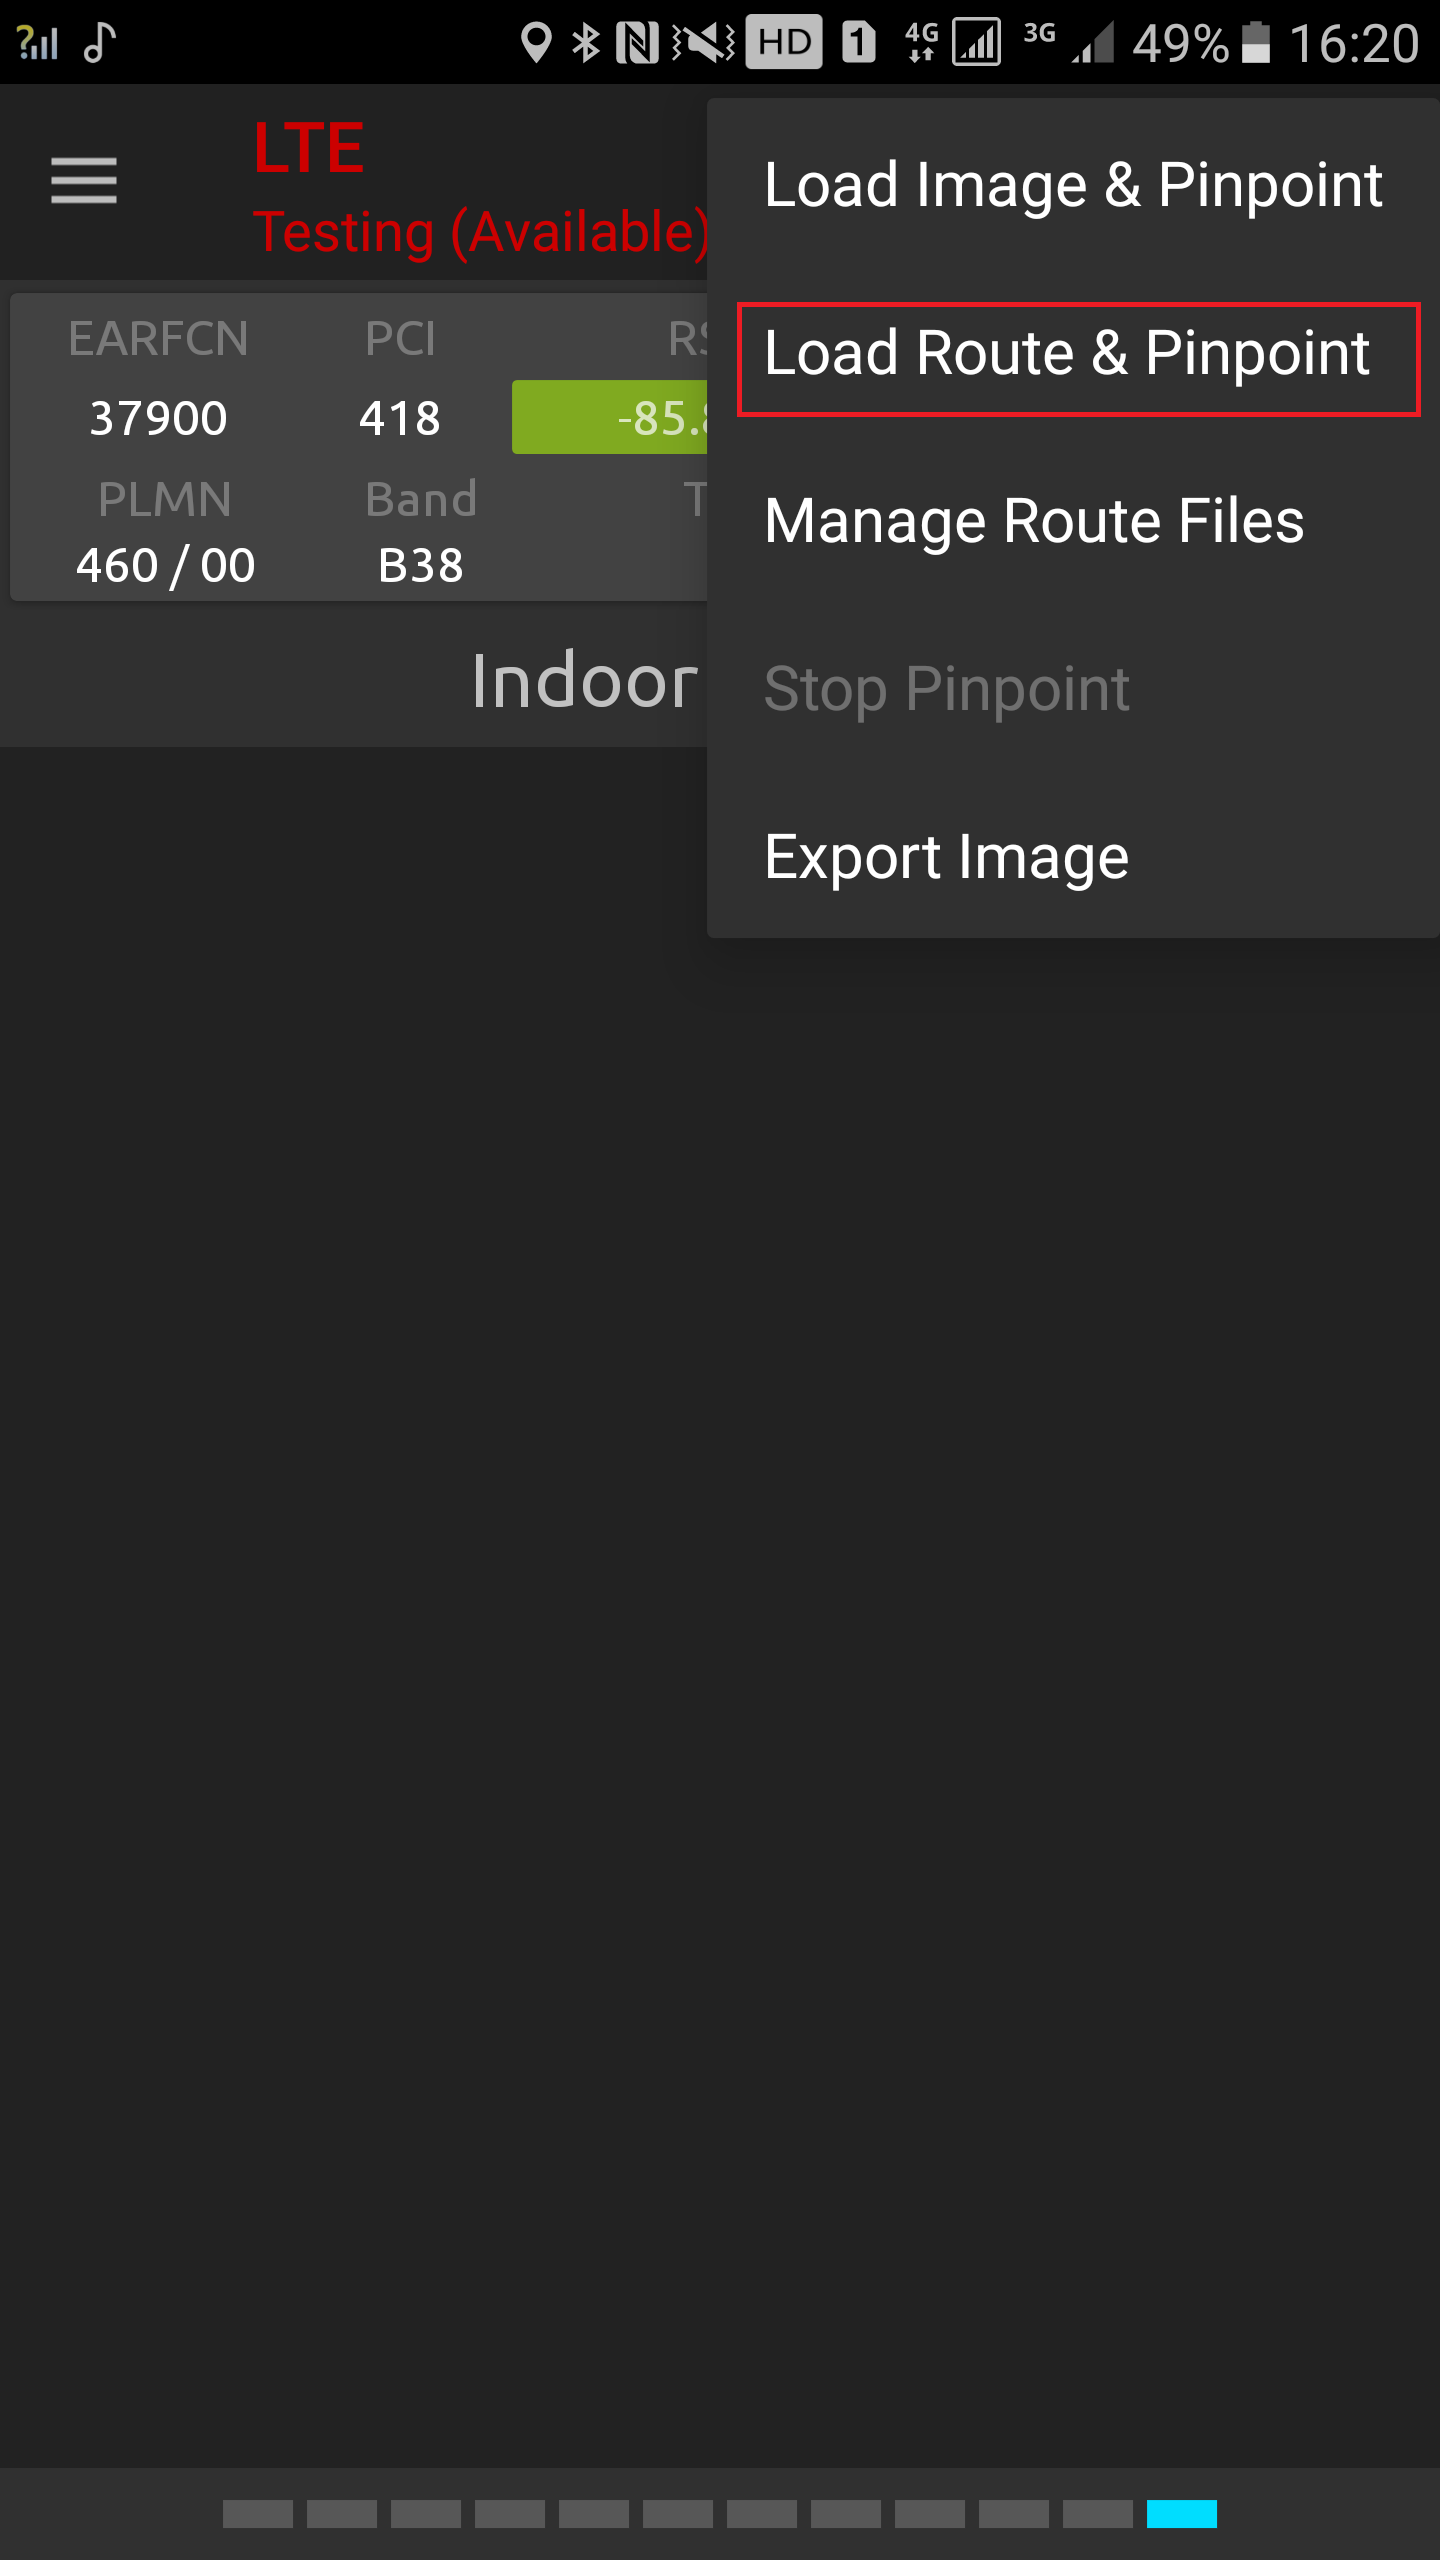
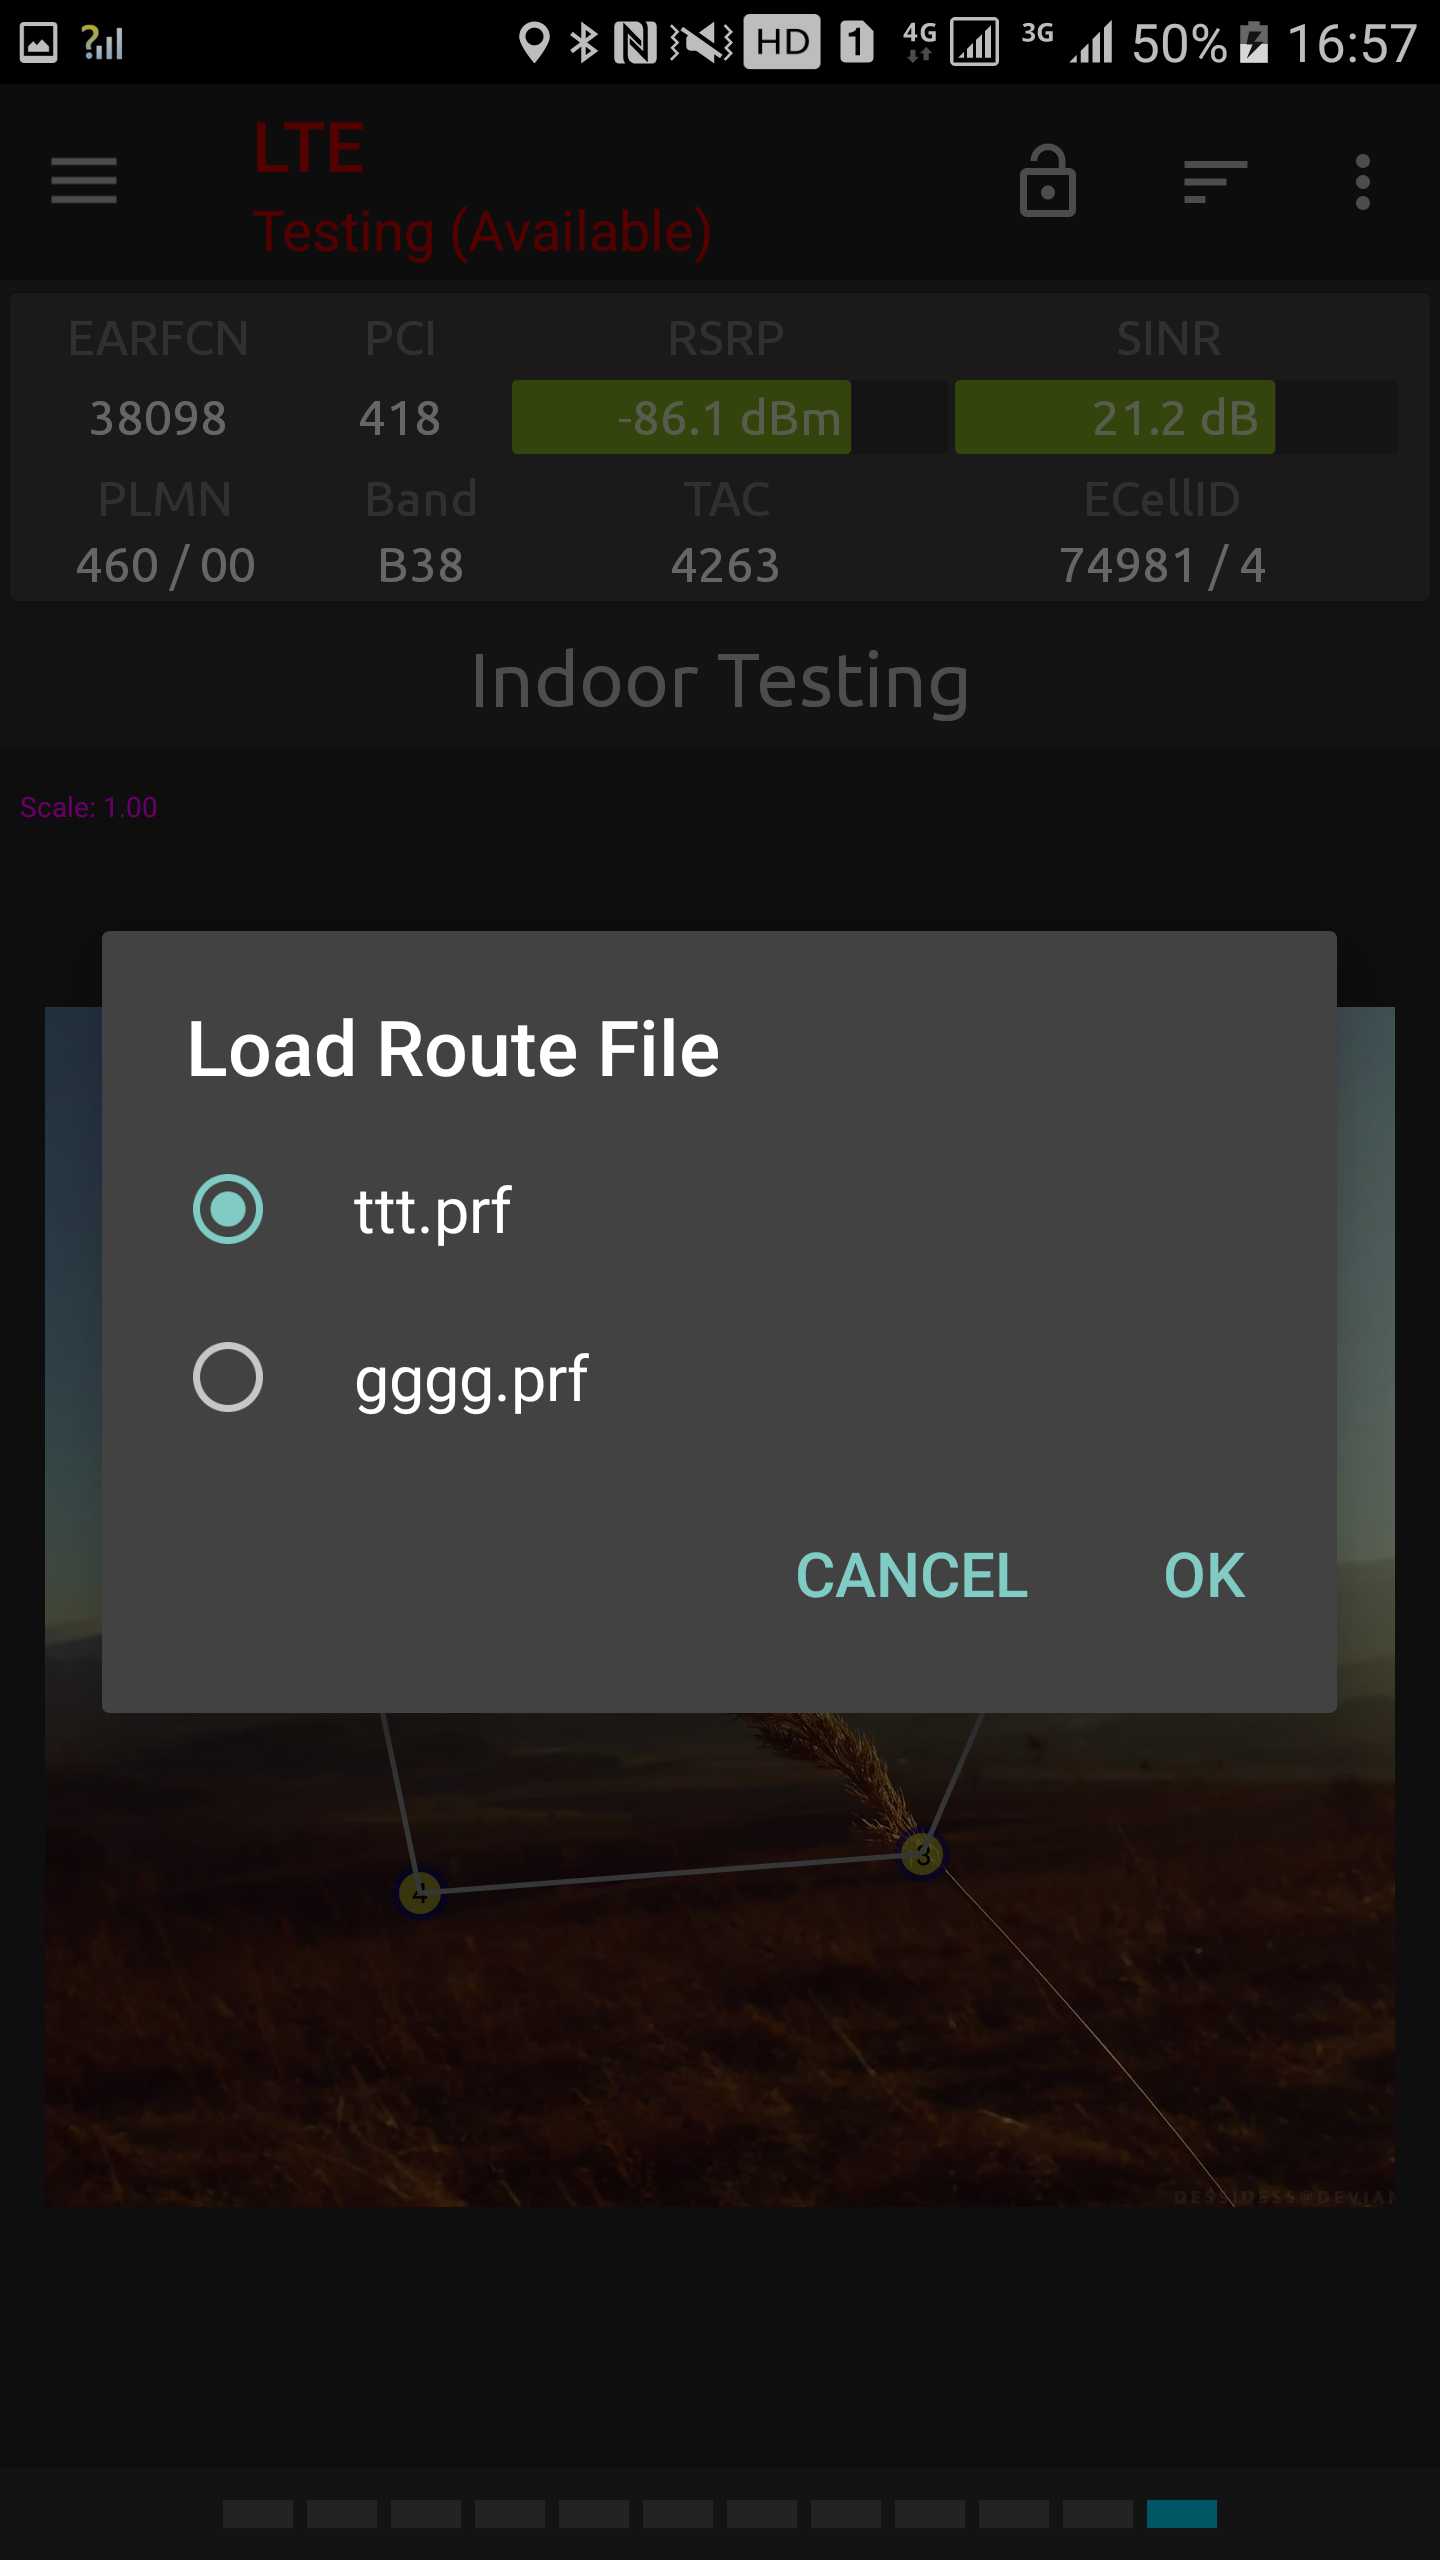
Select the desired route file from the list that appears, and tap Load.
Pinpointing Procedure
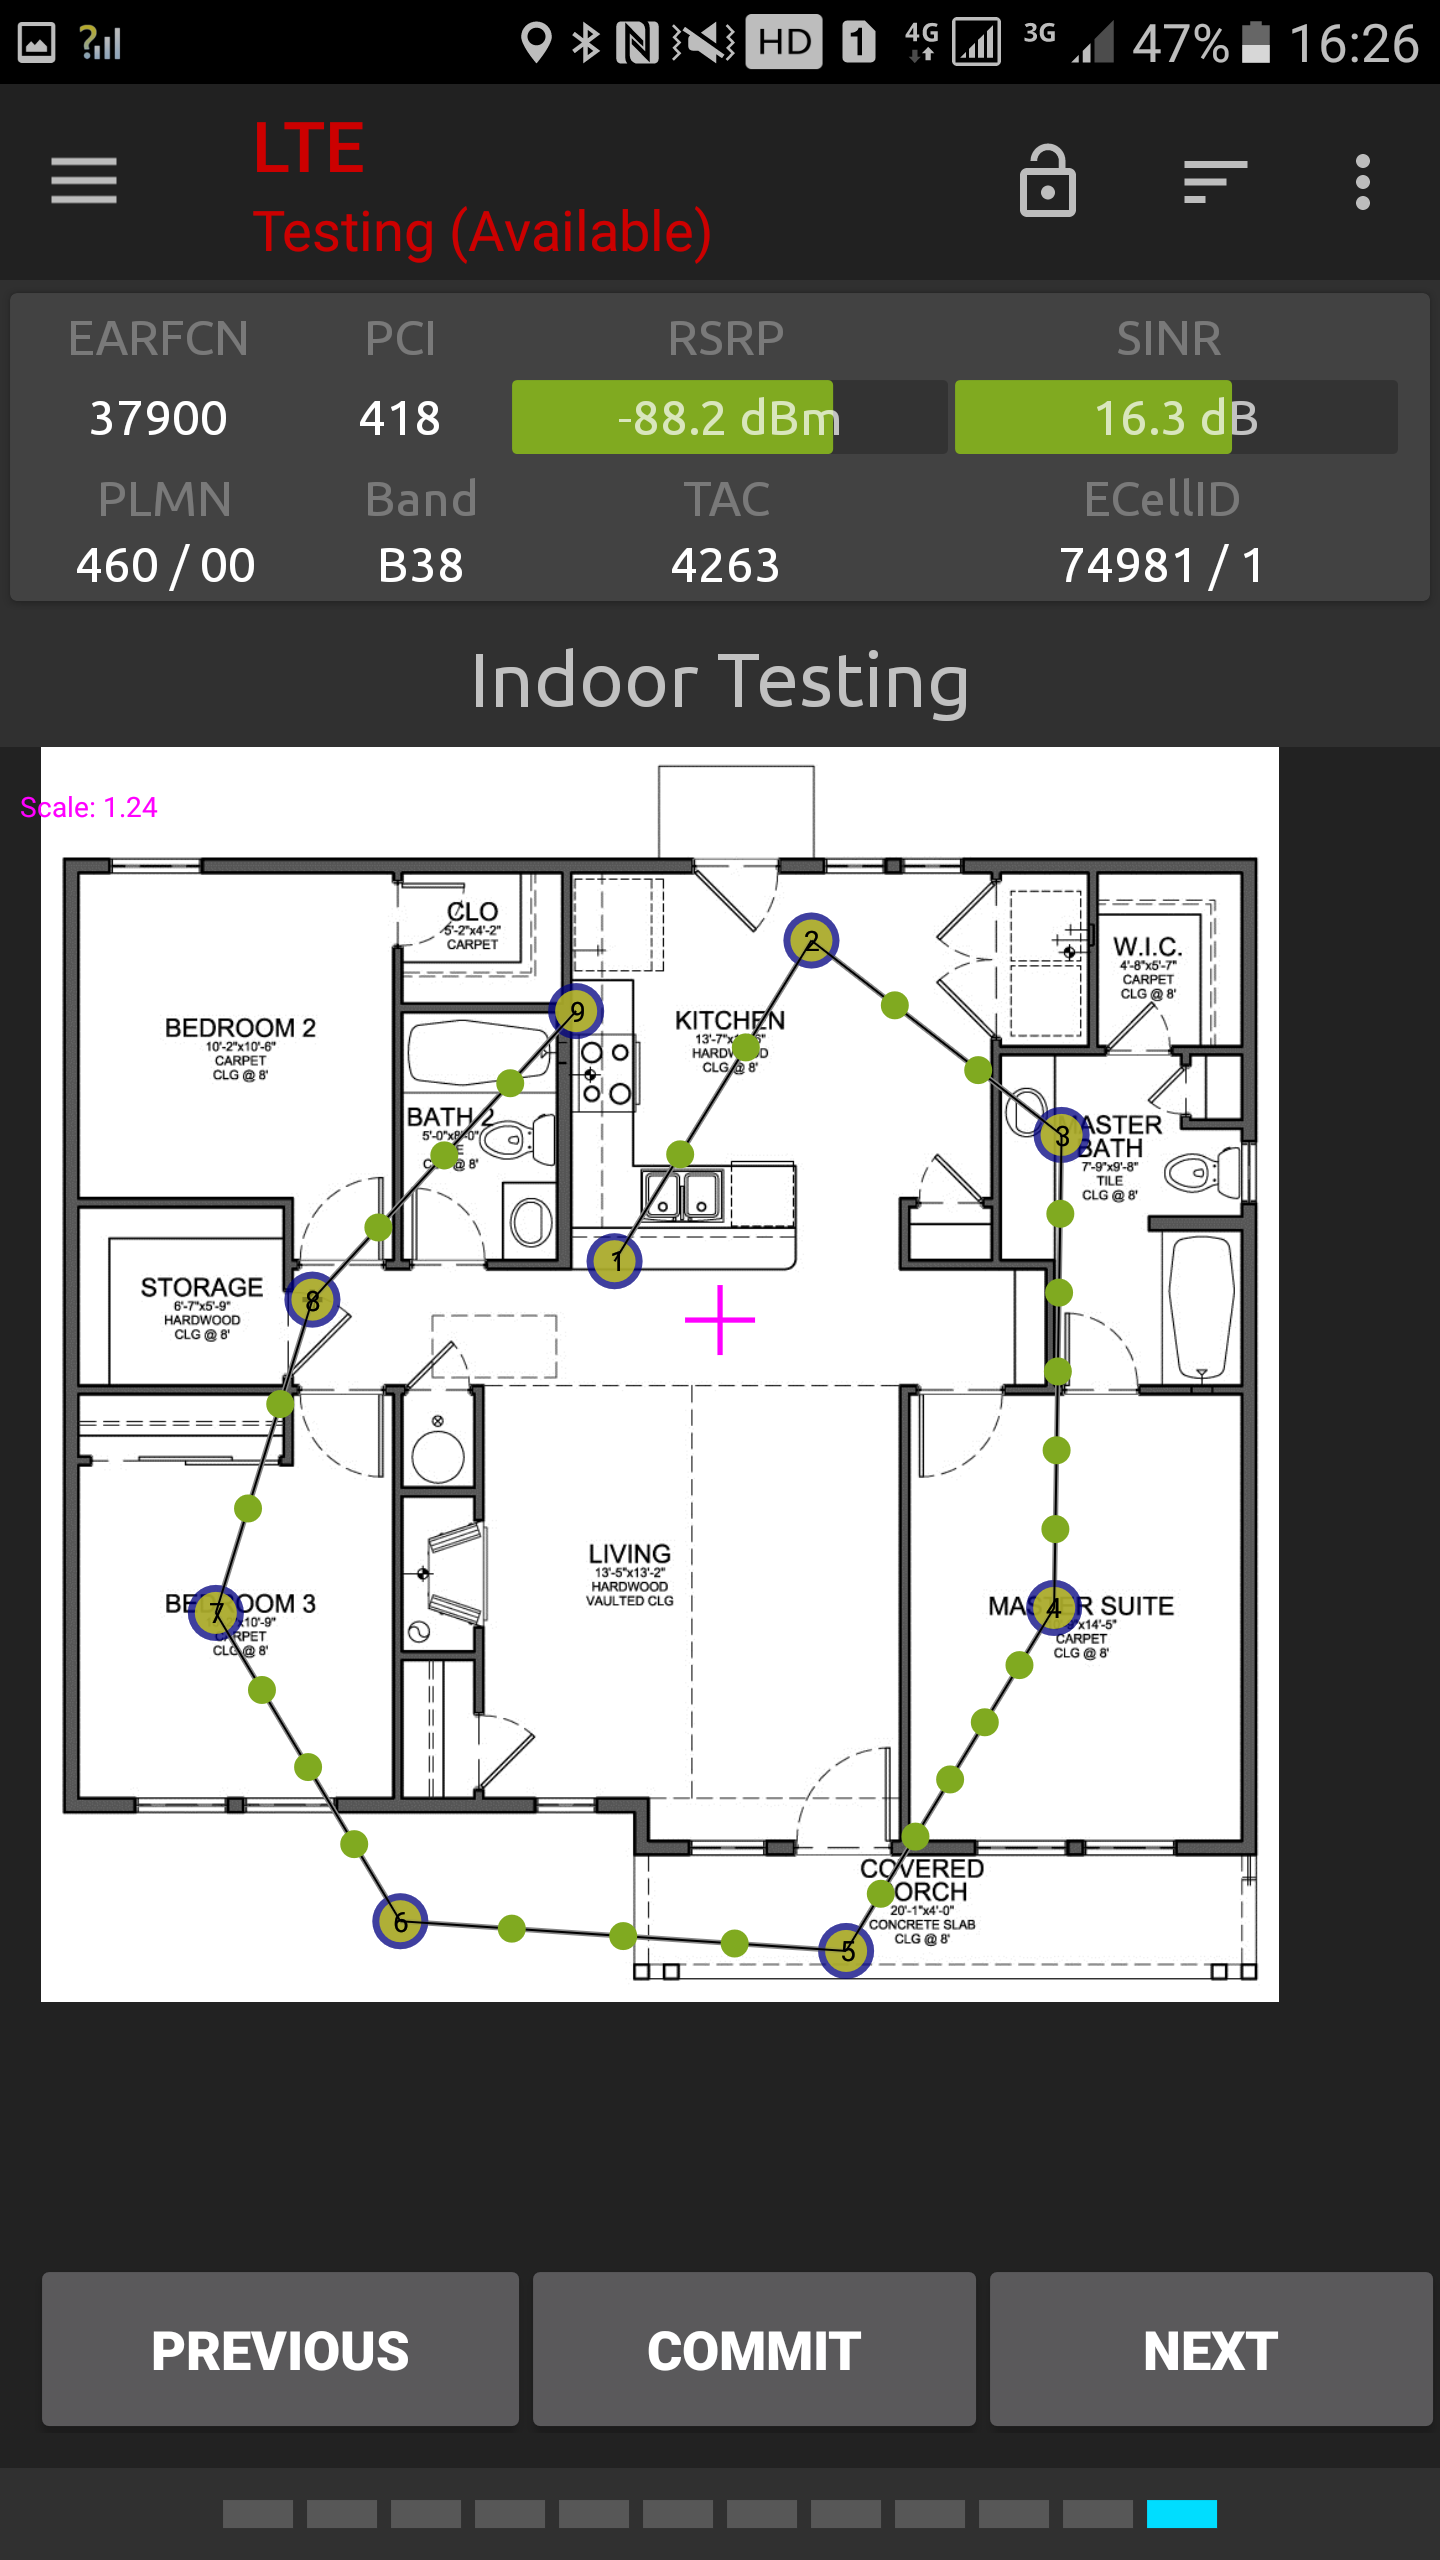
Regardless of which method you used to load your planned route, the route is drawn in dark red on the map. Waypoints are marked by pin symbols.
To pinpoint according to this route, do as follows:
Go to the physical location marked by the first waypoint (highlighted in black cross).
A panel with three buttons appears, and the map is centered around the first waypoint. Tap the Commit button to indicate that you are currently in that location.
Tap Next to proceed to the next waypoint. The highlighting in red then switches to that waypoint, and the map is re-centered around it.
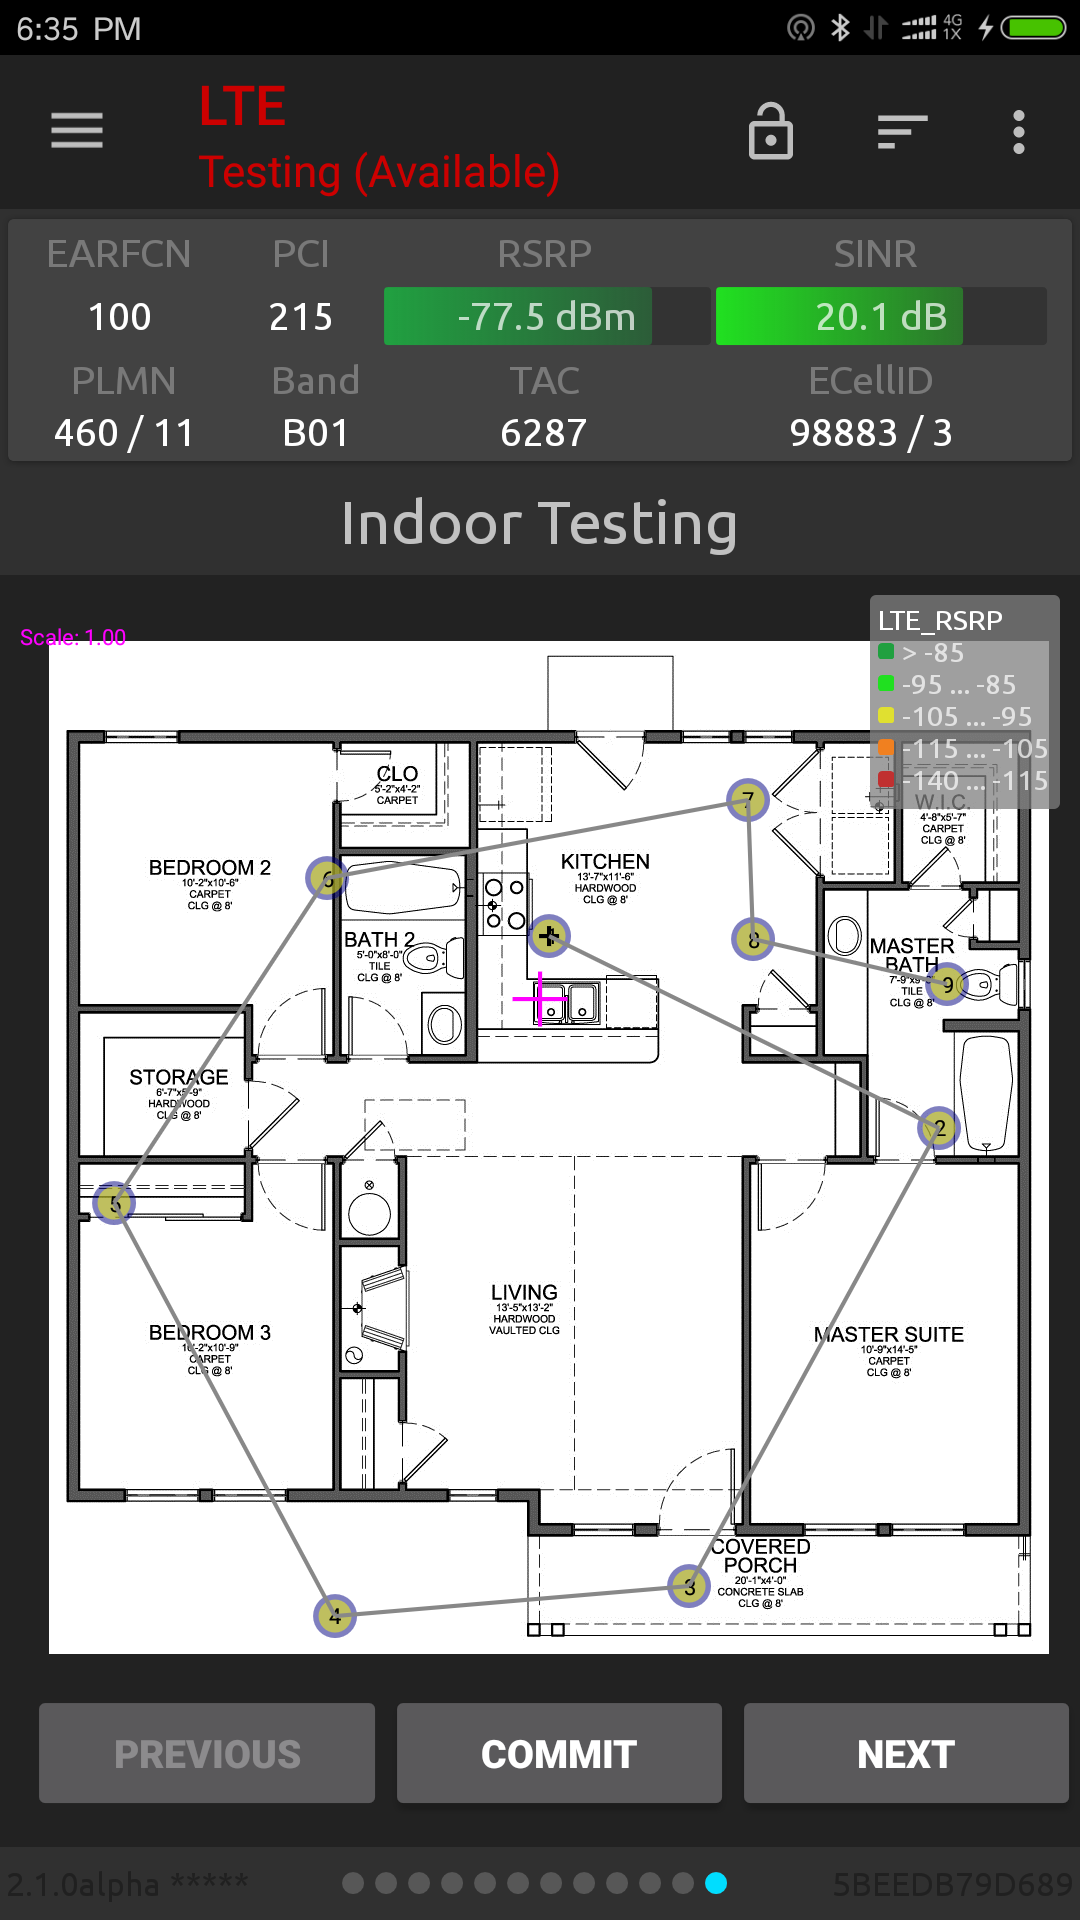
Walk in a straight line and at a steady pace towards the spot marked by the highlighted waypoint. When you have reached it, tap Commit. The route segment just completed is retraced in black.
Continue in this fashion until you have finished the route.
(It is possible to move backwards along the route by tapping the Previous button.)
When you have completed the route, the planned route will be unloaded and the testing map will remain. The route is removed from the Indoor Map view.